Ron Stultz
"BMW X5 - How to Replace the Rear Brake Rotors"
Summary: easy enough do-it-yourself (DIY) but because you will not be able to remove the rear rotors with the hand brake pulled, you must take extra measure to ensure the X5 does not move on you as you jack up the rear to remove the tire/wheel.
Background:
BMW X5, 4.4i, model year 2000, 151,000 miles.
Rear pads needed replacing.
Decided to replace rear brake rotors, calipers and pads.
Safety first:
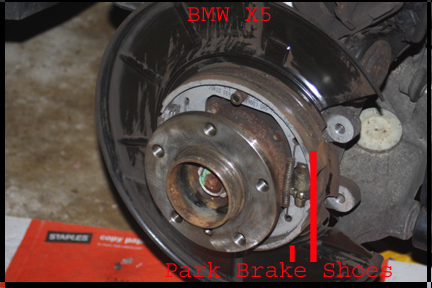
The hand/park brake is cabled to small brake shoes located on the extended portion of the rear rotor.
If you pull the hand/park brake, the shoes will be expanded out, pressing against the rotor and you will not be able to get the rotor free of the hub.
So, you can not pull the hand/park brake and this means you need to use extra measures to ensure the X5 does not move as you jack up the rear of the car.
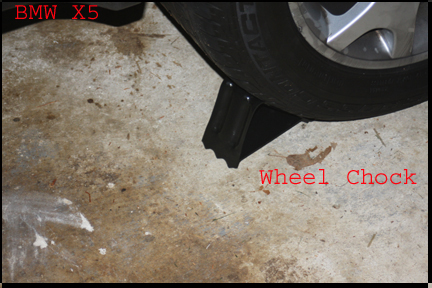
There are 2 wheel chocks in the rear compartment so grab them when you get the jack and shim them under the front tires.
As you jack up the rear on one side or the other, as you approach the point that the tire is just about to loose contact with the floor, the X5 might try to move forward.
If the X5 moves forward a little, lower the tire and reposition the jack and begin to lift again.
Once more as you approach the point of a rear tire leaving contact with the floor, go slow.
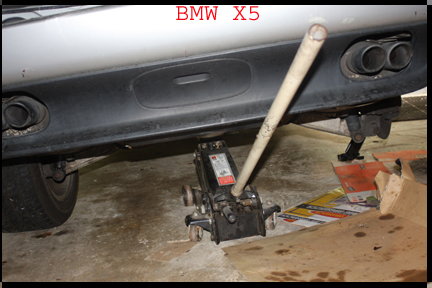
In my case, in addition to wheel chocks, I also placed a floor jack under the rear end as a safety measure.
To start, see "BMX X5 - How to Replace Rear Brake Pads"
Following the instructions above, you should now be at the point of the carrier off the hub.
Now using a 7mm external Torx socket, remove the bolt in the face of the rotor.
On both of my rotors, this bolt came out easily.
With the bolt out, grab the rotor and see if it will pull off the hub.
If the rotor is stuck, use a rubber mallet to bang on the edge of the rotor you can get to from the backside.
With the rotor removed, inspect the park brake and associated.
If the hand/park brake shoes are worn down to the metal or close, you will have to replace them.
Now use a wire brush on the wheel hub, all around and clean the black shield.
You will note that in the image above, I have cardboard under the hub to catch brake debris and brake cleaner fluid.
Once the area around the rear hub is clean, shoot brake cleaner all over to remove any additional brake dust.
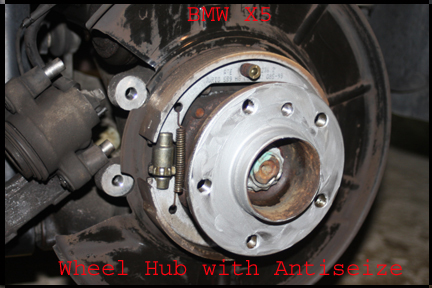
Apply anti-seize grease to the face of the hub.
You do not have to apply anti-seize but it helps ensure the next time someone tries to take the rotor off, it will not be "glued" to the hub.
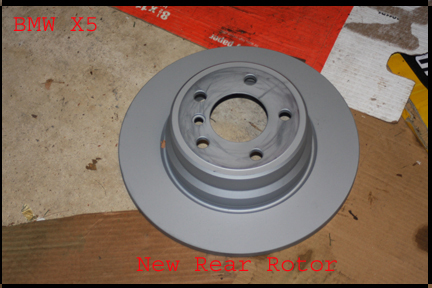
Place your new rotor on the hub and rotate it around such that the bolt hole in the rotor aligns with the bolt hole in the hub.
The bolt hole is the small hole in the rotor not in the lug nut pattern of holes.
Apply some anti-seize to the rotor bolt threads and reinstall it. Do not know specified torque but 30 foot pounds ought do as the rotor going to be held fast to the hub by the wheel lug nuts.
With new rotor in place, reinstall the cleaned carrier.
60 foot pounds ought be sufficient.
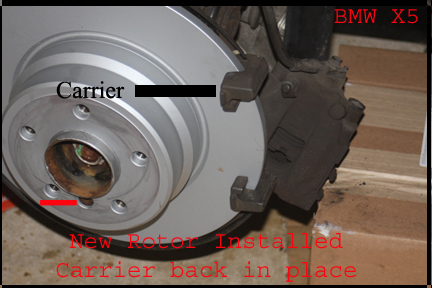
Note: in my case, I bought rotors with a special coating.
In the instructions that came with the rotors, I did not have to remove this coating before installing.
At this point, back to "BMW X5 - How to Replace the Rear Brake Pads" and complete the rear brake job.
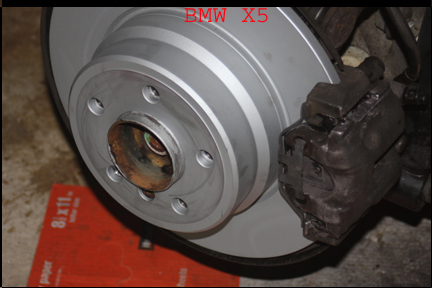
Test drive. With new rotors and pads installed and perhaps a replacement caliper, the pads are going to be tight against the rotor.
Read the instructions that came with your brake pads on how to break them in.
For the first 10 miles or so, you are likely to rear noise from the rear as the special coating on the rotors get rubbed off and the new pads set and get some breathing room off the rotor.
As with any repair job on a car, for some time after you complete the job, check for leaks around the rear wheels and check the brake fluid reservoir and ensure you are not leaking brake fluid.