Ron Stultz
"BMW X5 - Valve Cover Gasket Replacement"
Summary: using super-tack gasket sealer, can be done without removing "clips" on fuel injectors."
Background:
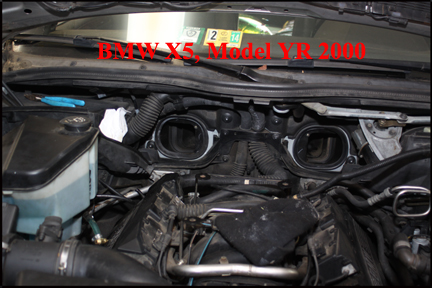
BMW X5: model year 2000, 4.4i, 188,000 miles.
Valve cover gaskets replaced once by dealer around 100,000 miles.
Valve cover gaskets leaking badly.
Dealer charges $800+ for valve cover replacement.
As part of oil separator replacement, valve cover gaskets done at same time.
Valve gasket replacement:
Remove acoustic cover on top of engine.
Remove the shroud mounted on firewall. This will give you room to work on back of engine.

On left side, as you stand in front of car, remove air filter box and hose that extend to front of car and also hose to air pump.
On right side, find electrical cable to goes over top valve cover.
Crawl under car and find that same cable and unhook it where it is held in place.
On right side, gently pull cable towards the front and off the valve cover.
On left side, remove the plastic cover on each valve cover.
Unhook the coil leads from spark plug.
Open electrical box on left side and move coil wires up out of the way. Label if you wish.
Remove spark coils. Label each as you want to put them back in the order you took them out.
Remove all bolts holding valve cover in place.
Once loose of the head, it should move downward and then back to extract from car.
Repeat above for right side.
Getting right side out of car is a little tougher than left side because of steering shaft, but you can do it.
With both covers out of car, remove old gaskets.
Take small flat blade screw driver and clean grooves in cover. Once major removed, use a Q-tip to clean even more.
Use some grease remover on grooves so they are clean.
On heads, remove any left over gasket or any sealant. Especially check back of engine where there are semi-circle depressions.
Now take Permatex high tack gasket sealant and using a Q-tip, apply evenly in grooves in valve cover. On new gasket, also apply some sealant. Let both sit for a minute or 2 and then put new gasket into grooves in cover making sure gasket is tight in groove all around.
Let sealed covers sit overnight.
Now, one side at a time, apply sealant to semi-circles in the back of head and on each corner. Wait for a minute.
Place cover into car and move slowly into place. Once it seated properly on back and all sides, insert bolts and begin to tighten cover into place.
The left side should have plenty of room for the cover installation as long as the coil wires are up out of the way.
On the right side, move all hoses related to cabin heat up out of the way. These are held in place by a clamp you can open and remove. You might also want to move the cabin heat control valve upward and out of the way.
On the right side, again apply sealant to semi-circles on back of head and all corners.
Now getting right side in place is a little harder because of the steering column but you can do it.
Once the cover is in place on the head, install bolts, coils, coil wires.