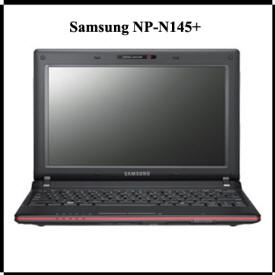
"Samsung NP-N145+ - How to Remove the Motherboard"
By Ron Stultz
20 March 2014

Summary: easy enough do-it-yourself (DIY). Requires removal of many small Phillips screws and uncoupling various connectors on the motherboard.
Background:
Samsung NP-N145+ netbook.
3 Years old.
Would not turn on so taken apart to determine problem.
Only real reason to remove motherboard would be to replace the basic input, output system (BIOS) battery on the bottom of the motherboard or to replace a defective motherboard.
Motherboards for the Samsung NP-N145+ are available on eBay.
The BIOS battery should be available at Radio Shack, on eBay or perhaps a "Battery" store.
How to remove the motherboard:
Remove the bottom cover of the NP-N145+.
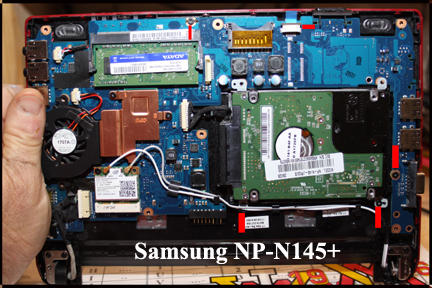
Remove the small Phillips screws shows on pic of exposed motherboard below.

Disconnect the hard drive from its connector and set aside.
Disconnect the small ribbon cable at front edge of NP-N145+. To do this you pull the gray piece around the cable upward and then using the blue tab on the cable to pull it up out of the connector.
Disconnect the liquid crystal display (LCD) cable. Be careful with all cable but especially this one.
Disconnect the 3 wire cable at the top left or speaker cable.
One at a time, use your fingernails to gently pull straight up on the white wire connectors on the WiFi module. There is a very find wire inside the small connectors that push onto connectors on the WiFi module.
Make sure all cables are unhooked from any part of the motherboard.
Now gently lift the motherboard up and away from the NP-N145+ case top half.
Reinstalling the motherboard:
With all cables out of the way, sit the motherboard back into the top half of the NP-N145+ plastic case.
Make sure the ON/OFF slide switch plastic cover is installed properly over the edge of the motherboard.
Replace the small Phillips screws holding the motherboard to the case top half.
Reinstall the hard drive and reinstall (2) Phillips screws that hold half of the hard drive in place.
Take ribbon cable on front edge and holding part of motherboard connector up, insert ribbon cable into connector as far as possible and then push moving part of connector down to hold ribbon cable in place.
Reconnect the LCD and the speaker cables.
Now gently route the 2 white, WiFi wires up to the WiFi module.
Now take each connector and place it gently on top of the matching WiFi module connector and push down gently.
There is a very find wire in the inside of the connector that must mate with a small socket in the motherboard connector and you do not want to break this pin off.
With all cables attached and properly routed, look the entire motherboard over for anything out of place. All connectors tight?