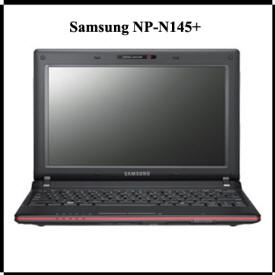
"Samsung NP-N145+ - How to Replace the Keyboard"
By Ron Stultz
19 March 2014

Summary: Easy enough do-it-yourself (DIY) by removing (3) Phillips screws from the bottom cover, lifting the keyboard up and then unhooking it from the motherboard connector.
Background:
Samsung NP-N145+.
3 years old.
Removed motherboard and thus had to remove keyboard.
A keyboard for the NP-N145+ is available on eBay and other Internet websites.
The keyboard is held to the top cover by (3) small Phillips screws that go through the bottom case cover up into the keyboard.
Additionally, the keyboard is tabbed into the top cover on either side of the touch pad.
The keyboard has a ribbon cable on its backside that connects it to the NP-N145+ motherboard.
Note: if you are having problems with some keys of the keyboard not working correctly, use this guide to ensure the keyboard connector is properly fitted into the motherboard connector.
How to remove the keyboard:
Remove the power adapter plug from the NP-N145+.
Remove the battery from the NP-N145+.
Close the liquid crystal display (LCD).
Turn the NP-N145+ over so it is resting on the LCD.
Look on bottom cover and find screw holes that are labeled "Keyboard" or "kbd".
Using a small Phillips screw driver, remove screws from the holes with the "keyboard" label.
Put all Phillips screws in a container.
Turn NP-N145+ over, sit on bottom and open LCD.
On front edge of laptop, the edge closes to LCD, lift it up.
Once lifted, pull the keyboard slowly towards the LCD and observe the metal tabs on either side of the touchpad.
Continue pulling gently until the metal tabs are clear of the NP-N145+ top cover.
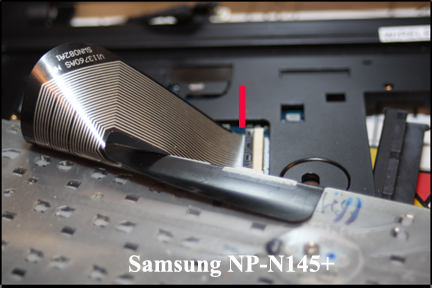
Now rotate the keyboard along its long axis, as shown below, to see the keyboard ribbon cable.

Using a fingernail, at the connector that is on the motherboard, flip up the edge of the connector that sits on top of the keyboard ribbon cable.
Once the front of the motherboard connector is flipped up, the keyboard ribbon cable is free and you can remove the keyboard completely.
Reinstalling keyboard:
With keyboard turned over with ribbon cable exposed, turn cable so silver lines are up and with the portion of the motherboard connector that moves, flipped up, insert the keyboard ribbon cable into the connector.
Make sure the keyboard cable is evenly installed in the connector and then flip the motherboard connector down on top of the ribbon cable.
Now rotate the keyboard into the correct position for install and gently tab the back into the top cover of the NP-N145+.
Now let the keyboard down and it should fit snuggly along the edge closest to the LCD. Make sure it is down all along the front edge such that it fits into the top cover of the NP-N145+.
Close the LCD.
Turn the NP-N145+ over so it is resting on the LCD.
Reinstall the 3 small Phillips screws that hold the keyboard to the bottom cover.